

- This is an optional item, therefore you must touch the checkmark located at the bottom right and switch the setting to "In Progress".
- Now you can open the test by selecting the arrow control.
- While there are standardized tests for measuring sound transmission through a wall, this is a simpler more practical test for our purposes.
- First, we must make some noise, selecting the "LFE" control will commence an LFE pink noise test tone playing through the sub.
- Adjusting the AVR gain setting could be by using the SPL meter (C-weighted) to register 115 dB, but the variations in system capability might make this dangerous for equipment.
- Do NOT turn the gain up to a point where the subs are distorting.
- While the test tone is playing, take your iPad and move to another room. Be sure to close the door.
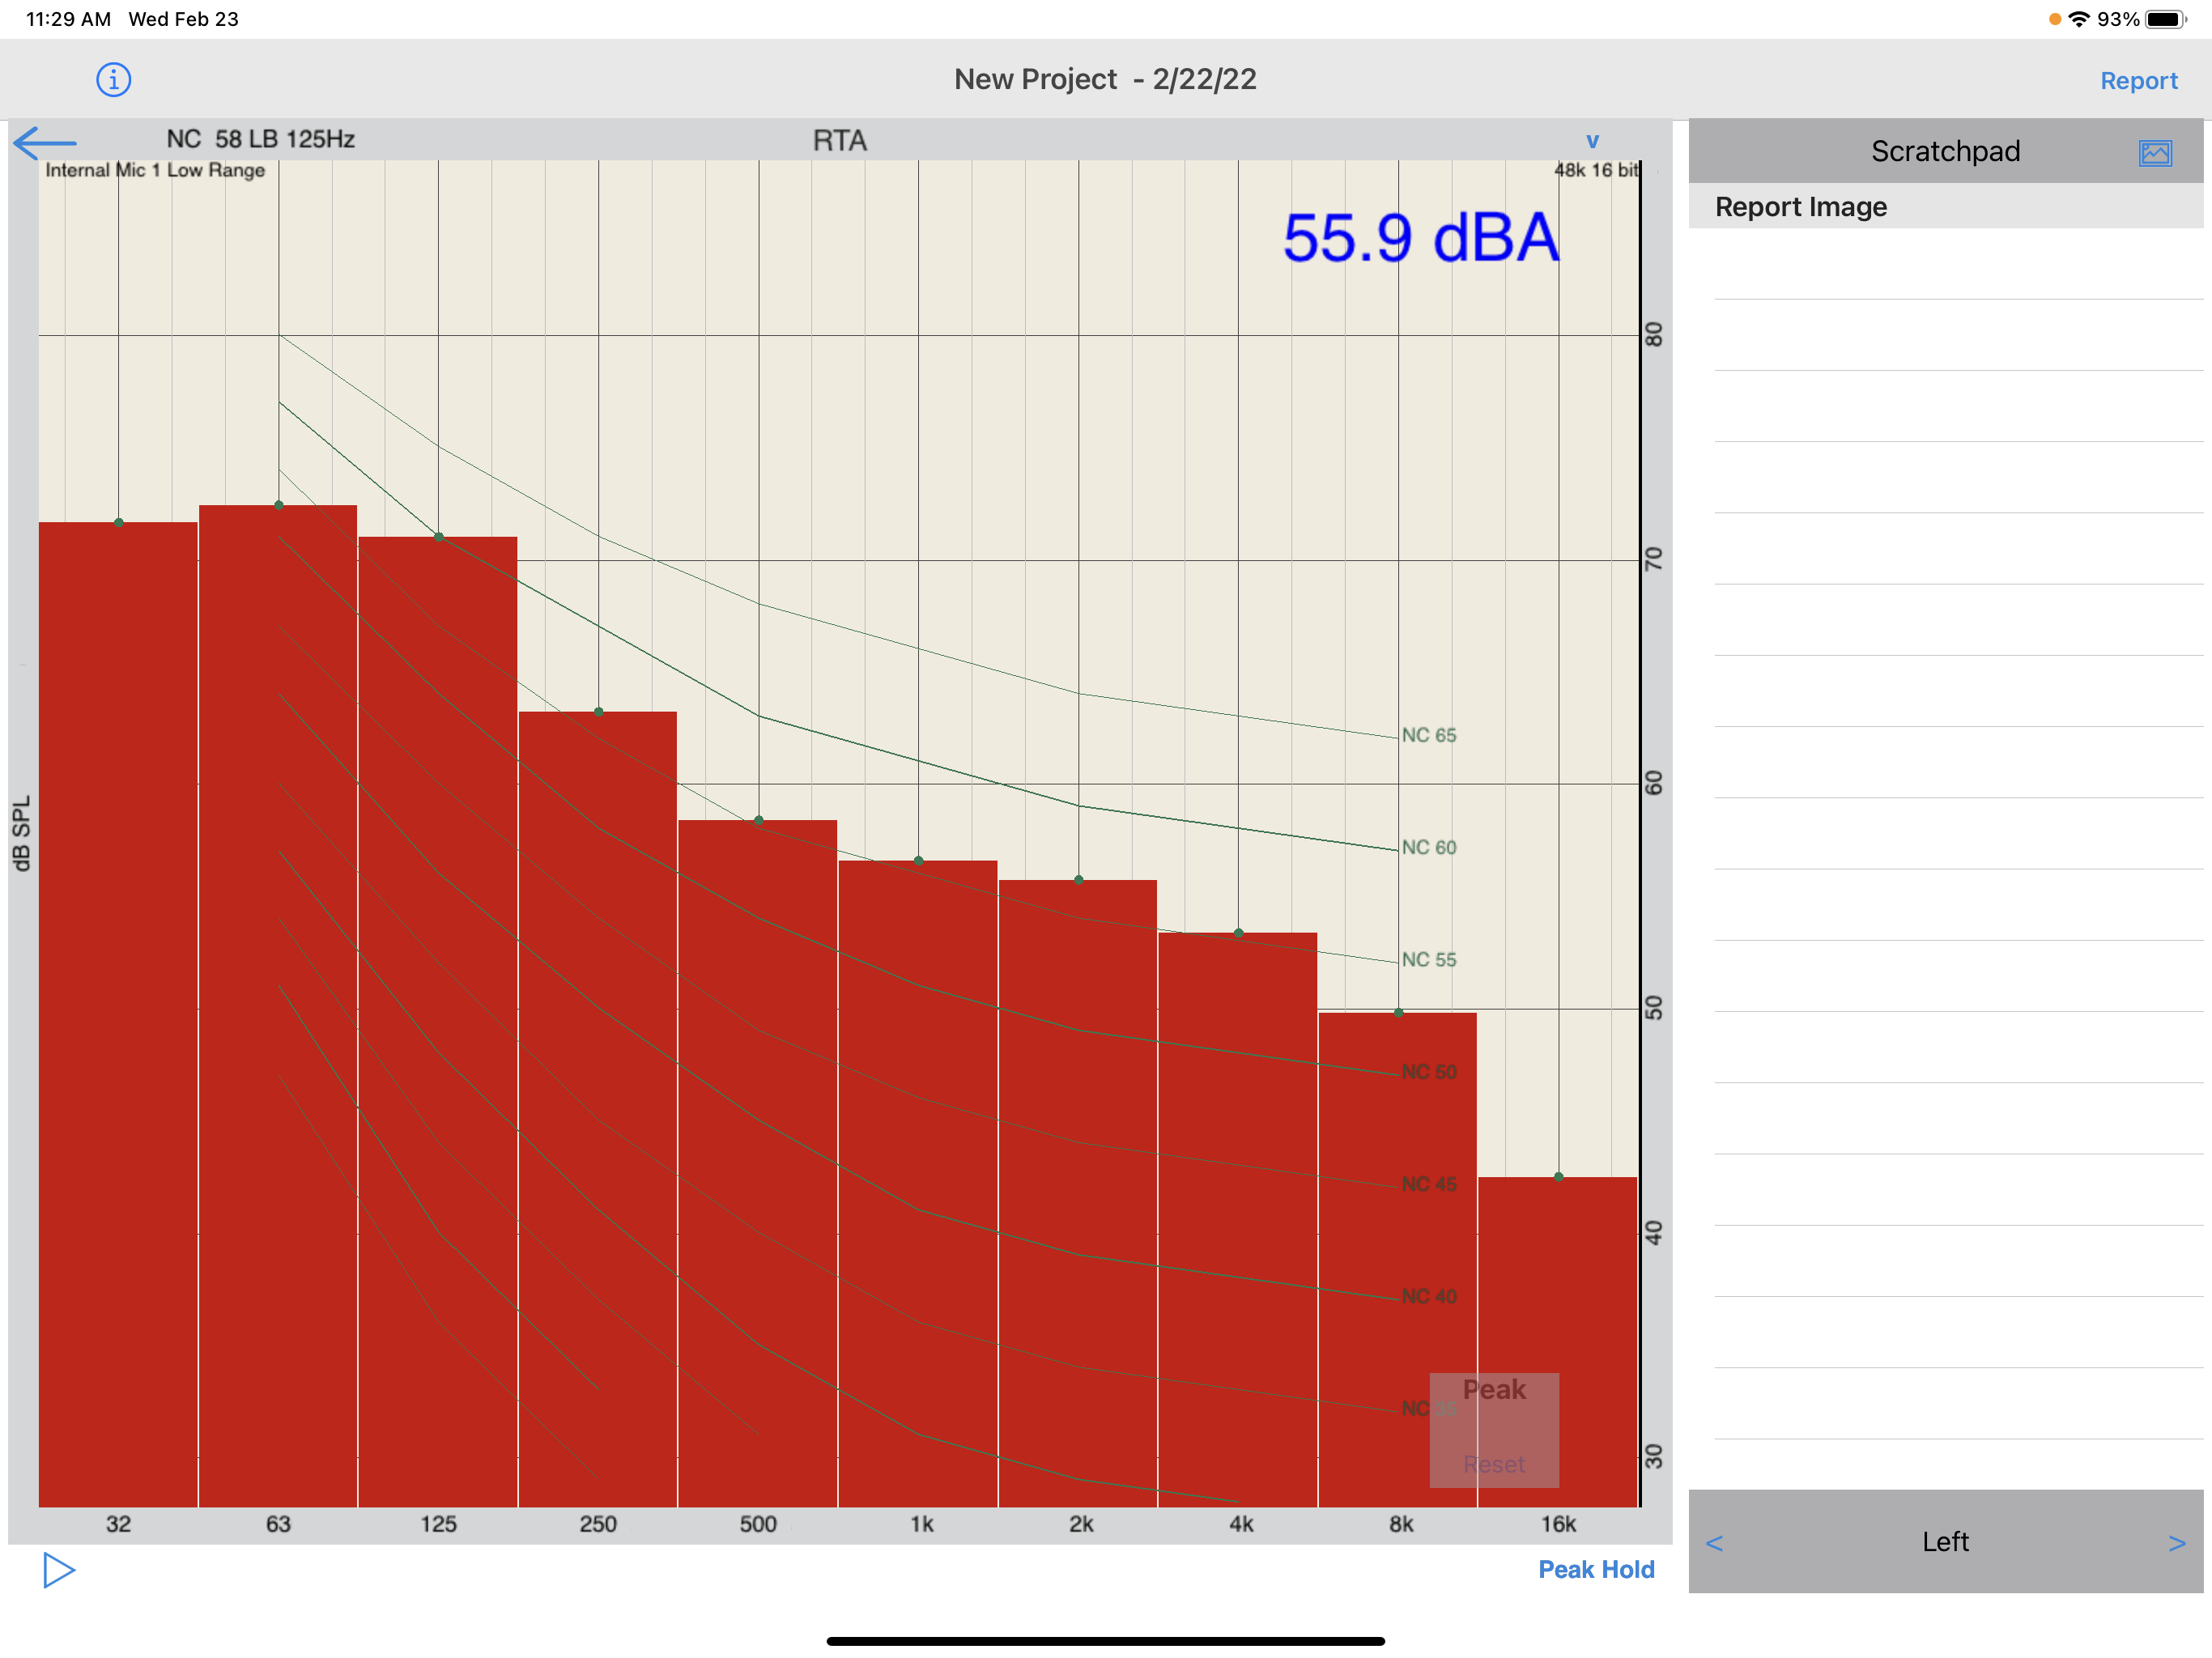
- You can test rooms throughout the house. Note the NC level in each room or switch the RTA settings to PNC for a more realistic test.
- Close the test by touching the return arrow on the top left, You can mark the test complete and add any comments or NC (PNC) levels in various rooms.
- Typical NC levels in most homes without a system playing are NC 25 to NC 40. A reasonable Sound Leakage test for a typical system in another room will be NC 50 to NC 60.
- In situations where sound isolation techniques have been employed a more scientific test is to use ASTM E336-20 standards and a testing specialist.