Click the arrow next to the checklist item to enter the Mode Map Test.
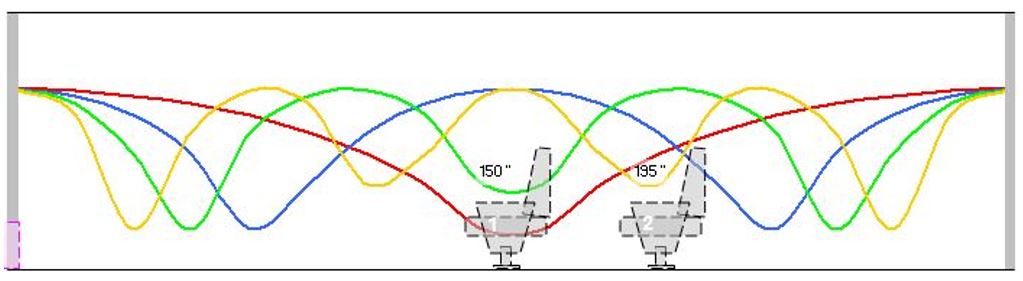
You'll see the same signal generator we used for the vibration test.
Select the lowest significant mode frequency and adjust the gain to a comfortable level.
Sit in each seat and freely move around listening for variations in the sound level.
Note any nulls as significant drops in sound level. You might want to use some painters tape to mark the location on the floor. Be sure to write the frequency of the signal on the tape.
This where advanced HAA training steps in. Our goal is to place seats in areas where each mode signal has a similar sound level.
If seats are movable, such as a couches or unfixed seats, we can search for areas where all seats could be moved to equalize the sound level of all tones.
The real goal of this test is to confirm the mode map. In a mostly rectangular room the mode map should resemble our diagram.
In an irregular room this process becomes more difficult, but knowing where the nulls and peaks for each mode are can provide some valuable insight.
In the next checklist elements we'll look at better seat, sub, and speaker locations.
Touch "Done" and mark the item complete. You can add any comments as well.
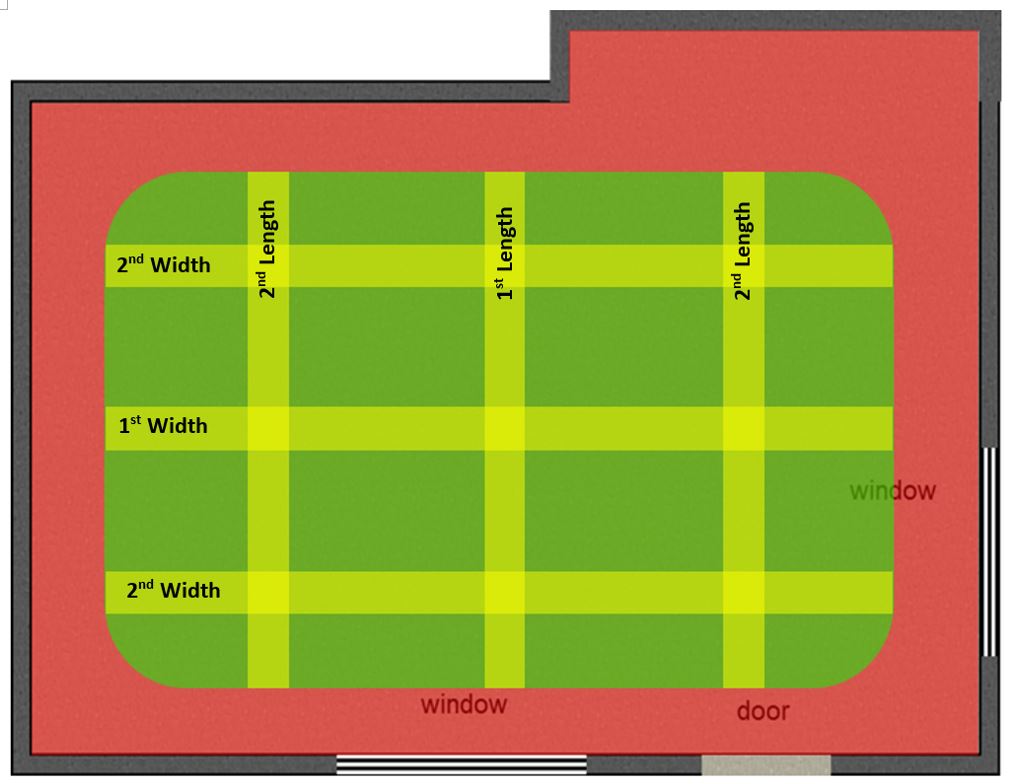
Mode Shapes
The diagram on the left shows a common way to display mode shapes which indicate the variation in intensity at each mode frequency across the room.
The same pattern exists for the width and length, at least in a mostly rectangular room.
The mode map only depicts the 1st and 2nd length and width modes (red and blue shapes). The yellow zones on the mode map correspond to the dips (nulls) in the mode shape.
In a mostly rectangular room a first strategy is to move the seats to green zones. Tip: Ignore the width mode yellow zones (these are parallel to the side walls) while placing seats.
We'll look at eliminating the width yellow zones with subwoofer placement.
You might find that you'll move back and forth in the checklist over this test and next few checklist items. The placement f the seats, subs, and speakers are dependent on each other.
We call the interdependency of the seats, subs, and speakers the Acoustical Framework.
Most of these details are highly dependent on the initial design of a room, but in some cases things can be moved during a calibration.