First, we can see the accuracy of our mode calculation. The varied flexibility of the walls, shape of the room, doors, and drop ceilings can complicate the generation of modes in a room.
Since we are focusing on low frequencies, only the sub will be used for this test.
The position of the sub will also affect results. A sub placed in a null will destimulate that mode and it might not show up.
In an HAA Workshop we cheat a bit by placing the sub in a corner and one mic in an opposite or adjacent corner. In a real scenario, we'll leave the subs where they are.
This test uses a single mic placed within 18" (~.5 m) to all surfaces of the corner.
Touch the "Play" control to initiate an LFE pink noise test tone from the Apple TV.
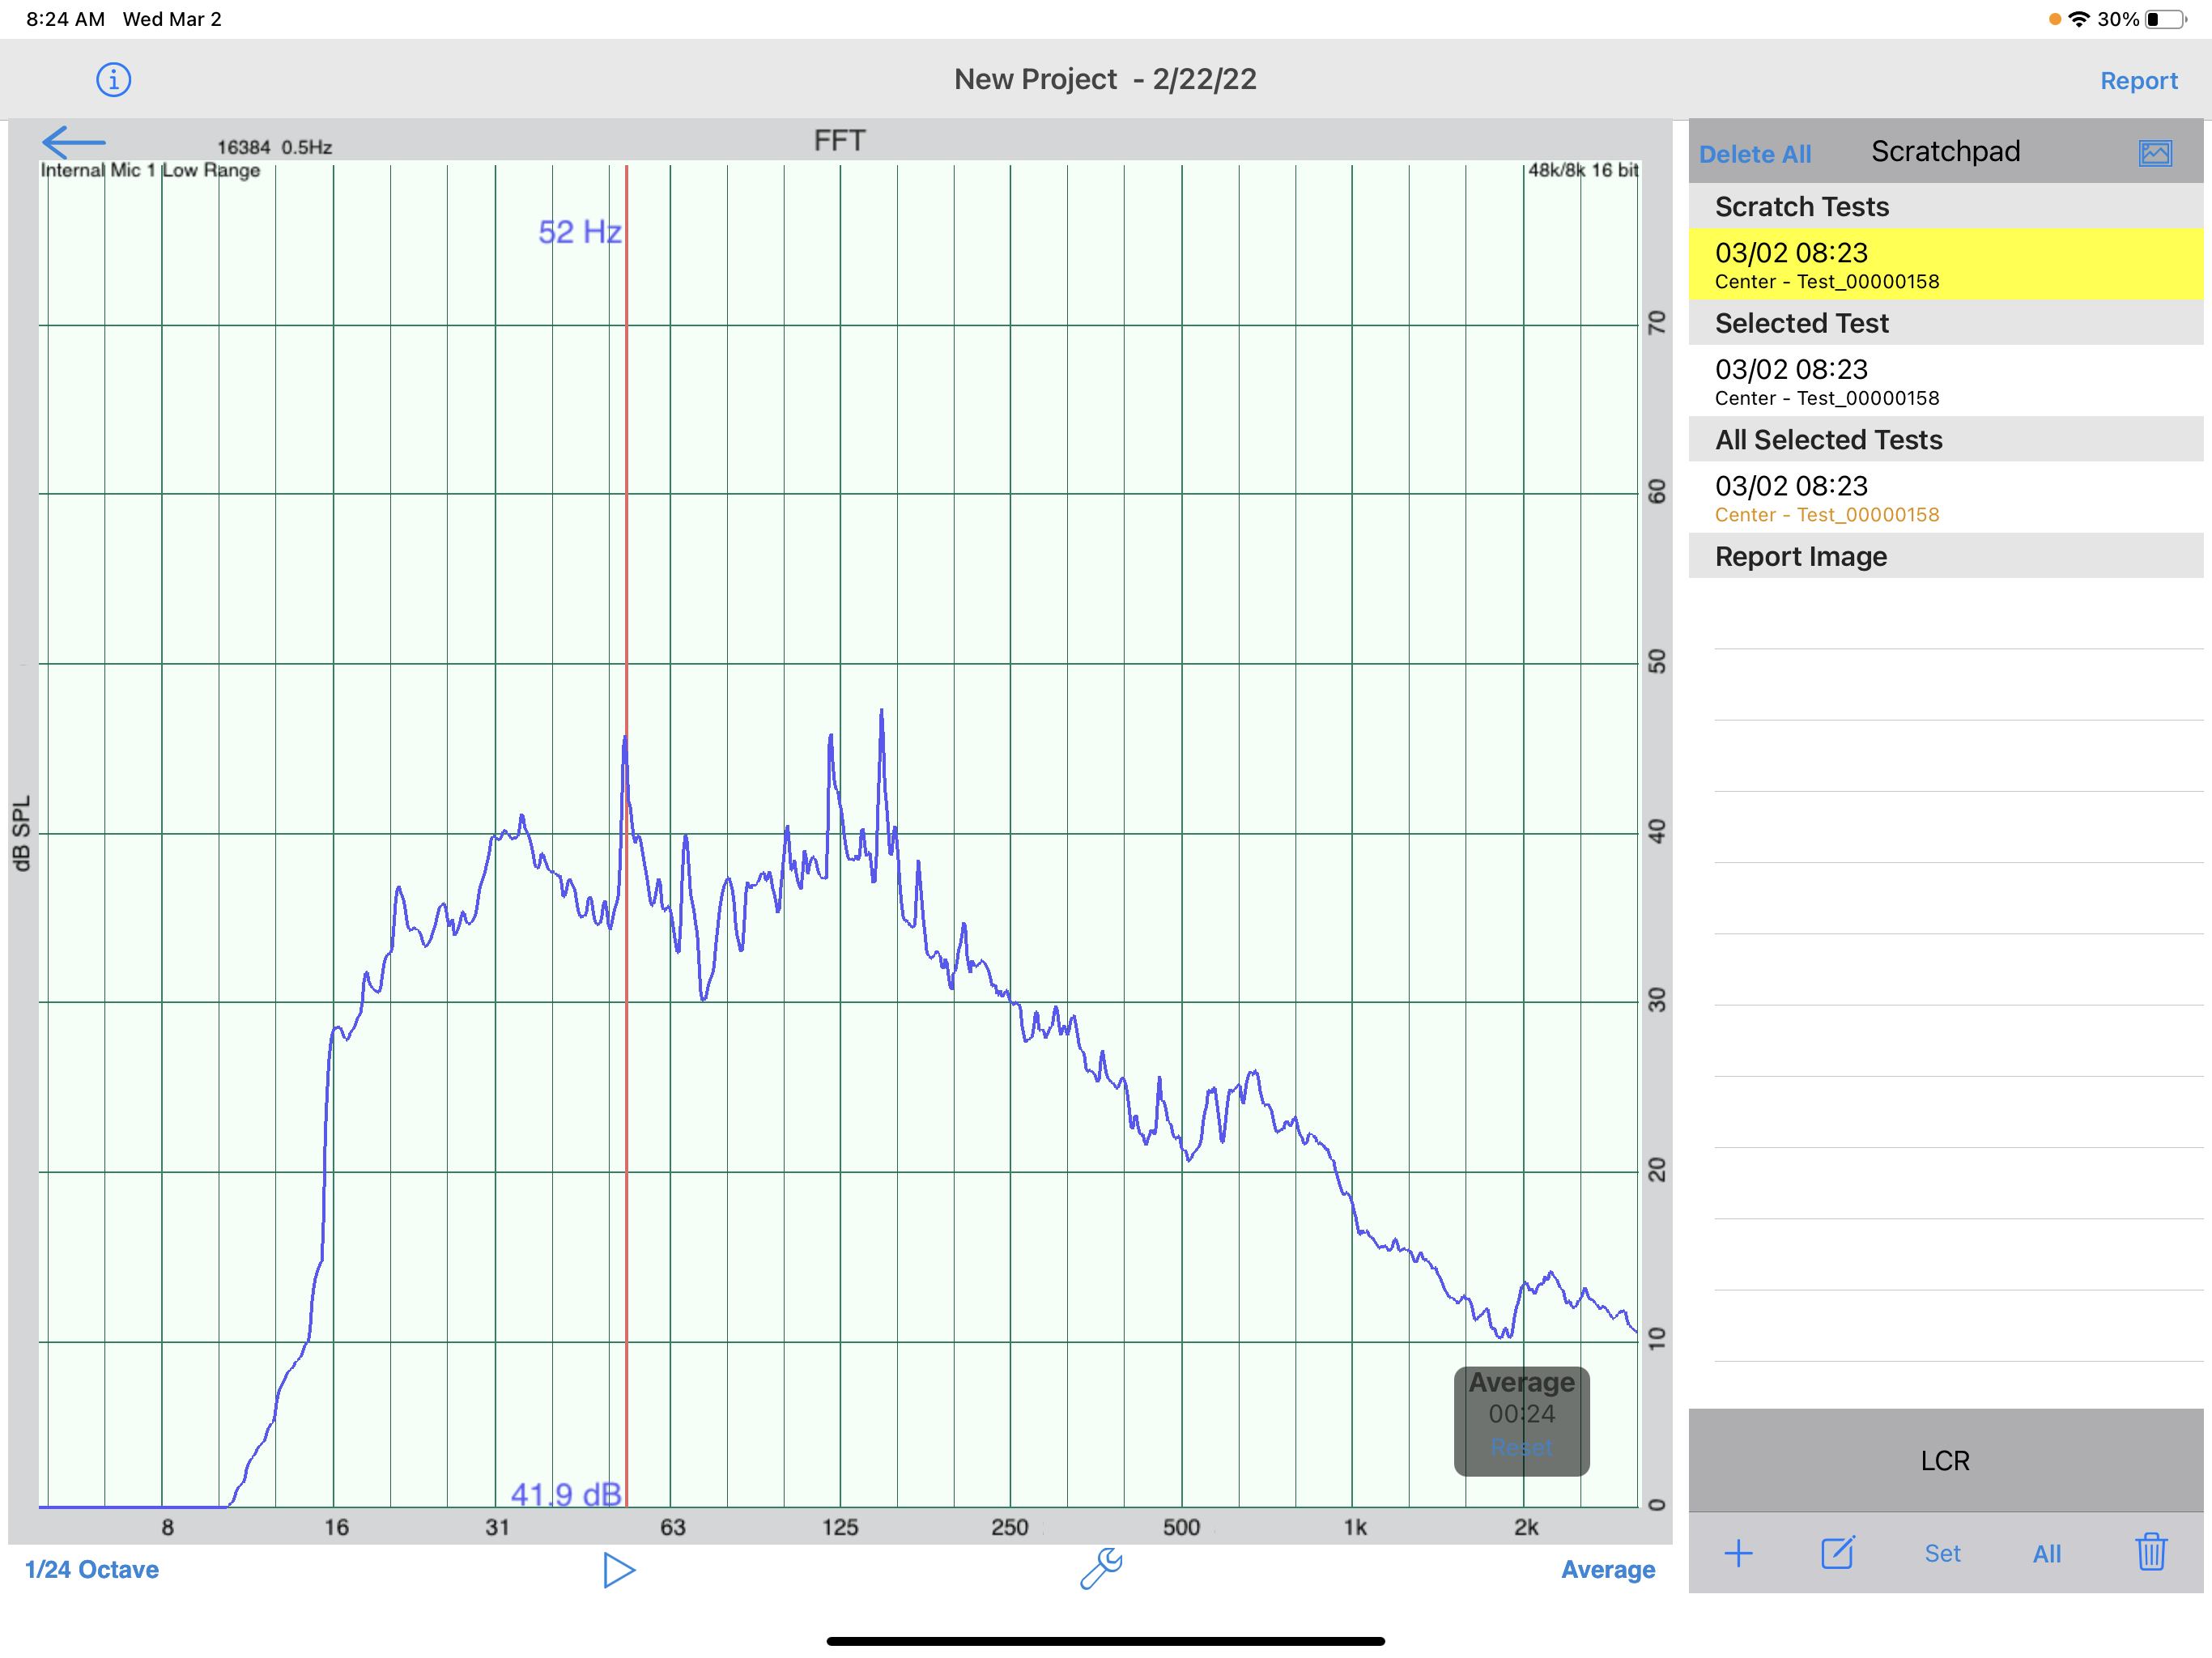
You'll see a variety of peaks in the plot. Touch "Pause" and touch the "+" control to save the plot. Now you can analyze the results.
Place your finger on the plot, a red line will appear. You can determine the frequency of each peak this way sliding from peak to peak.
In the next checklist element, we'll use the lowest of these frequencies to help us understand the mode map of the room.
You can store the plot image by clicking the "Screen Shot" icon below the "Report" control.
Touch the arrow on the top left to complete the test. When back at the checklist touch the "checkmark" icon to mark the test complete. You can add the actual mode frequencies in the comments.